
Projecto DB
+5
Prata James
LBCSAM12
Administrador
Treel29
cdmafra
9 participantes
Página 1 de 3
Página 1 de 3 • 1, 2, 3 
Que nome preferem para a mini-série?
Projecto DB
 por cdmafra Seg 3 Ago - 23:07:50
Olá! Sou novo no fórum e este é apenas o meu 2º ou 3º post, mas já o sigo há algum tempo.
Bom, mas venho anunciar que estou a trabalhar para lançar uma proposta de uma "mini-série" em vídeo de Dragon Ball, fanwork, sem fins lucrativos. Para já, ainda não sei o que vou precisar ao certo para dar continuidade ao projecto, mas sei que se avançar, eu posso ser o argumentista, roteirista, guionista ou lá o que se chama quem faz a história.
Para este projecto, nada de pagamentos em dinheiro envolvidos, sem fins lucrativos, e, obviamente, fanwork, nada de dinheiros, repito.
Como disse, será uma "mini-série", nada de 60, 100, 200 ou 300 episódios. Apenas entre 20 e 40. Se avançar, os vídeos serão para publicar na Net, de forma gratuita, em sites como Youtube ou mesmo em torrents ou ficheiros para download. Sempre gratuito.
As minhas intenções com o realizar deste projecto é dar uma continuidade a Dragon Ball, não o deixar morrer nem ser esquecido! Os "aficcionados" e fãs por DB merecem, ou não?
Pergunto aqui 2 coisas:
1- Quem está disponível para fazer parte do projecto?
2- Nome para a série/projecto? (a história passar-se-á 10 anos depois do fim da data da última cena do filme "100 anos depois")
3- Sugestões vossas para o projecto.
Assim que possível, postarei mais detalhes sobre o projecto!
Até já!
Última edição por cdmafra em Sáb 8 Ago - 12:32:36, editado 3 vez(es) (Motivo da edição : Acrescentar opções na votação)

cdmafra- Saiyajin

- Número de Mensagens : 76
Data de inscrição : 30/07/2009
Z-Points : 196
Re: Projecto DB
por Treel29 Seg 3 Ago - 23:23:33
Nome... Nada de AF's nem GS nem isso, nome original como...
Dragon Ball NB (New Beggining) ou Dragon Ball NC (novo começo)
que acham?
Dragon Ball NB (New Beggining) ou Dragon Ball NC (novo começo)
que acham?

Treel29- Super Saiyajin 4

-

Número de Mensagens : 1251
Idade : 30
Localização : Em casa
Emprego/lazer : Estudante/Handball player
Humor : Muito bom
Data de inscrição : 21/06/2009
Z-Points : 3525
Re: Projecto DB
por Administrador Seg 3 Ago - 23:27:16
E se começa-se onde Akira Toriyama acabou pondo o GT de parte e historia começar depois do Goku ter lançado o Genki-Dama no Kid Buu.
O que acham?
Cumps
TheKillerJp
O que acham?
Cumps
TheKillerJp

Administrador- Administrador

-

Número de Mensagens : 1641
Idade : 39
Data de inscrição : 13/07/2009
Z-Points : 4937 -

Re
por cdmafra Ter 4 Ago - 11:35:12
TheKillerJp escreveu:E se começa-se onde Akira Toriyama acabou pondo o GT de parte e historia começar depois do Goku ter lançado o Genki-Dama no Kid Buu.
O que acham?
Cumps
TheKillerJp
Não sei...o GT foi a série que menos gostei, admito. Mas já que existe, e teve o final que teve, podia aproveitar-se isso para fazer uma história da geração de Vegeta Jr. e Goku Jr.
Contudo, também não me desagrada a ideia de começar depois do fim do DBZ. Só que nesse caso não haveria nenhuma espécie de continuidade ao fim do DB, apenas um futuro alternativo...
cdmafra- Saiyajin
- Número de Mensagens : 76
Data de inscrição : 30/07/2009
Z-Points : 196
Re
por cdmafra Ter 4 Ago - 11:37:05
Treel29 escreveu:Nome... Nada de AF's nem GS nem isso, nome original como...
Dragon Ball NB (New Beggining) ou Dragon Ball NC (novo começo)
que acham?
"Dragon Ball NB (New Beggining)" é uma GRANDE ideia.
Mais títulos que vocês sugerem?
cdmafra- Saiyajin
- Número de Mensagens : 76
Data de inscrição : 30/07/2009
Z-Points : 196
Re: Projecto DB
por LBCSAM12 Ter 4 Ago - 14:42:46
Pode ser talvez assim:
Dragon Ball NE (Nova Era) ou NA (New Age)
e poderia ser também no projecto as ideias que o fanix2 contava na (Nova Aventura) dá mais sentido, não acham.
Dragon Ball NE (Nova Era) ou NA (New Age)
e poderia ser também no projecto as ideias que o fanix2 contava na (Nova Aventura) dá mais sentido, não acham.

LBCSAM12- Super Moderador
-
Número de Mensagens : 1578
Idade : 30
Localização : Alentejo
Emprego/lazer : Estudante (Curso Profissional Técnico de Informática)
Humor : Bom Humor
Data de inscrição : 28/02/2009
Z-Points : 3346 -
Re
por cdmafra Ter 4 Ago - 15:24:12
Luis escreveu:Pode ser talvez assim:
Dragon Ball NE (Nova Era) ou NA (New Age)
e poderia ser também no projecto as ideias que o fanix2 contava na (Nova Aventura) dá mais sentido, não acham.
Também são boas ideias para títulos.
Mas NA já temos a Nova Aventura do fanix2, por isso em vez de NA como abreviatura, devia ser tipo NWA ou coisa assim, para se diferenciar lol...
Quanto a aproveitar as ideias da Nova Aventura do fanix2, depende. Podia-se aproveitar algumas ideias dele, se ele permitir, mas não todas (algumas personagens que ele inventou, etc. seriam úteis, alguns destinos que ele inventou seriam igualmente úteis, etc.). O que eu estava mesmo mesmo a idealizar era dar uma continuação ao GT, mas uma coisa mais ao género "Z", que para mim foi a melhor série de DB.
Contudo, estou aberto a opiniões, é por aí que um trabalho começa xD
cdmafra- Saiyajin
- Número de Mensagens : 76
Data de inscrição : 30/07/2009
Z-Points : 196
Re
por cdmafra Ter 4 Ago - 23:23:38
Para que saibam, também começei a recolher opiniões em:
1
e
2
Irei postar em mais sítios e mantê-los-ei sempre informados.
1
e
2
Irei postar em mais sítios e mantê-los-ei sempre informados.
cdmafra- Saiyajin
- Número de Mensagens : 76
Data de inscrição : 30/07/2009
Z-Points : 196
Re: Projecto DB
por Prata James Qua 5 Ago - 10:30:33
Eu estou disponivel para o projecto.
Já agora sabes com que programa é que vais fazer o "Anime"?
Já agora sabes com que programa é que vais fazer o "Anime"?
Prata James- Super Saiyajin 2

-
Número de Mensagens : 352
Idade : 27
Humor : Nao me chateiem, senão ja sabem o que vos acontece ;)
Data de inscrição : 26/02/2009
Z-Points : 436
Re
por cdmafra Qua 5 Ago - 11:43:17
Lebron James escreveu:Eu estou disponivel para o projecto.
Já agora sabes com que programa é que vais fazer o "Anime"?
Isso não irá ser comigo lol...eu vou arranjar voluntários por aí que percebam disso...xD
cdmafra- Saiyajin
- Número de Mensagens : 76
Data de inscrição : 30/07/2009
Z-Points : 196
Re
por cdmafra Qua 5 Ago - 17:21:48
Banda Sonora. Que tal aproveitarmos a do DBZ? Para mim é a melhor banda sonora de todas no DB...
cdmafra- Saiyajin
- Número de Mensagens : 76
Data de inscrição : 30/07/2009
Z-Points : 196
Treel29- Super Saiyajin 4
-
Número de Mensagens : 1251
Idade : 30
Localização : Em casa
Emprego/lazer : Estudante/Handball player
Humor : Muito bom
Data de inscrição : 21/06/2009
Z-Points : 3525
LBCSAM12- Super Moderador
-
Número de Mensagens : 1578
Idade : 30
Localização : Alentejo
Emprego/lazer : Estudante (Curso Profissional Técnico de Informática)
Humor : Bom Humor
Data de inscrição : 28/02/2009
Z-Points : 3346 -
Re: Projecto DB
por Fanix2 Qui 6 Ago - 12:37:07
Se houver interesse podes aproveitar algumas das ideias que tenho colocado na minha história, não há problema...  Em relação aos desenhos não posso ajudar e não conheço quem possa...

Fanix2- Administrador
-
Número de Mensagens : 1015
Idade : 34
Data de inscrição : 22/02/2009
Z-Points : 2106 -
cdmafra- Saiyajin
- Número de Mensagens : 76
Data de inscrição : 30/07/2009
Z-Points : 196
Treel29- Super Saiyajin 4
-
Número de Mensagens : 1251
Idade : 30
Localização : Em casa
Emprego/lazer : Estudante/Handball player
Humor : Muito bom
Data de inscrição : 21/06/2009
Z-Points : 3525
Re: Projecto DB
por Prata James Qui 6 Ago - 22:55:02
Boa, já sabes estou dentro do projecto (espero eu) mas olha nao achas que tambem se devia criar um manga?cdmafra escreveu:Posso estar à beira de arranjar um anime maker
Prata James- Super Saiyajin 2
-
Número de Mensagens : 352
Idade : 27
Humor : Nao me chateiem, senão ja sabem o que vos acontece ;)
Data de inscrição : 26/02/2009
Z-Points : 436
Re
por cdmafra Qui 6 Ago - 23:13:24
Lebron James escreveu:Boa, já sabes estou dentro do projecto (espero eu) mas olha nao achas que tambem se devia criar um manga?cdmafra escreveu:Posso estar à beira de arranjar um anime maker
Estás dentro? Óptimo! Que queres/podes fazer/ajudar no projecto? Criar um mangá talvez, mas só mais à frente se calhar...
cdmafra- Saiyajin
- Número de Mensagens : 76
Data de inscrição : 30/07/2009
Z-Points : 196
Re
por cdmafra Qui 6 Ago - 23:30:10
Afinal não tenho anime maker. O gajo que contactei pensava que se estava a falar em criar história lol...continuar a tentar...se alguém souber de pessoas que me possam ajudar neste campo, mas também no som e nas montagens dos sons, etc., podem dizer...
cdmafra- Saiyajin
- Número de Mensagens : 76
Data de inscrição : 30/07/2009
Z-Points : 196
Re: Projecto DB
por Administrador Sex 7 Ago - 0:30:33
Apresento o:
Anime Character Maker 2
Cumps
TheKillerJp
Isto é só uma brincadeira LOL
Anime Character Maker 2
Cumps
TheKillerJp
Isto é só uma brincadeira LOL
Administrador- Administrador
-
Número de Mensagens : 1641
Idade : 39
Data de inscrição : 13/07/2009
Z-Points : 4937 -
How to Create an Anime Artwork in Photoshop
por Administrador Sex 7 Ago - 0:38:35
Se isto servir para alguma coisa:


How to Create an Anime Artwork in Photoshop
Step 1 – The Outline
Most people draw the outline on paper then use a scanner to load the outline into Photoshop. Begin by opening the outline image into Photoshop.

1. Use the Levels tool (Image > Adjustments > Levels) to correct the contrast of the outline. You can do this with the Levels tool by moving the black and white input sliders towards the center of the histogram. Make sure that the background is 100% white and the outline is 100% black with smooth edges.
2. To begin, you’ll need to unlock the Background layer. To do this, double-click on the Background layer in the Layers palette and click OK in the New Layer window.
3. Now that the layer is unlocked, you can change the blending mode to Multiply. This will make the white background in the layer transparent.
Tip: Ensure that there are no broken lines. You will be using the Magic Wand tool often and broken lines will slow you down.
Step 2 – Separating the Outline
In this step, you’ll learn how to separate the outline and the background into two layers. This will also make the outline slightly thinner. You’ll also learn how to dissect the outline without any jagged edges using the Load Selection from Layer command.
image
In the above image, you can see the difference between using the Magic Wand tool and the Load Selection from Layer command. The Magic Wand tool produces jagged edges that become apparent when placed on a colored background. Instead of using the Magic Wand tool, use the Load Selection from Layer command to produce smoother outlines that blend well with any background.

1. In the Channels palette (Window > Channels), click on the load channel as selection button. This will create a selection using the tonal information from the layer. Press the Delete button on your keyboard to delete the white background.
2. Add a new layer below the outline layer and fill the layer with white.
3. Change the blending mode of the layer to Multiply.
Step 3 – Base Color
Now that we have the outline and white background separated, we can add the base color.

1. Add a new layer below the white layer.
2. Select the Magic Wand tool and, in the option bar, set the Tolerance to 50.
3. In the option bar, checkmark the Contiguous and Sample All Layers options.
4. With the Magic Wand tool selected, click where you want to add color.
5. Expand the selection by 3 pixels using the Expand command (Select > Modify > Expand). If you are using Windows, you can press Alt, S, M, E on your keyboard to quickly access this menu item.
6. Use the Paint Bucket tool to fill the selection with a color of your choice. Use the same technique (Create a selection with the Magic Wand tool then fill with the Paint Bucket tool) for the entire image.
Step 4 – Adding Shadows
In this part, you’ll learn how to add shadows to the image. One important technique from this step is how to select the correct color.

1. Create a new layer and position it between the white layer and the base color layer.
2. Select the Magic Wand tool and set the tolerance to 1 (so that it will only pick one color) and uncheck the Contiguous and Sample All Layers options.
3. Select the Brush tool and set the hardness to 100%. This will give the brush a sharp edge.
4. In the Tools palette, click on the foreground color. This will bring up the Color Picker window. Select the base color from where you want to start. This will give us the hue of the color. Move the slightly off the area to change the saturation and brightness of the color.
5. Paint the shadows. Be sure to pay attention to where the light is coming from to get proper looking shadows.
Learn step by step how this painting was created. You will get a good understanding of how to create anime images with beautiful lighting and learn techniques that will help you in many types of drawings.
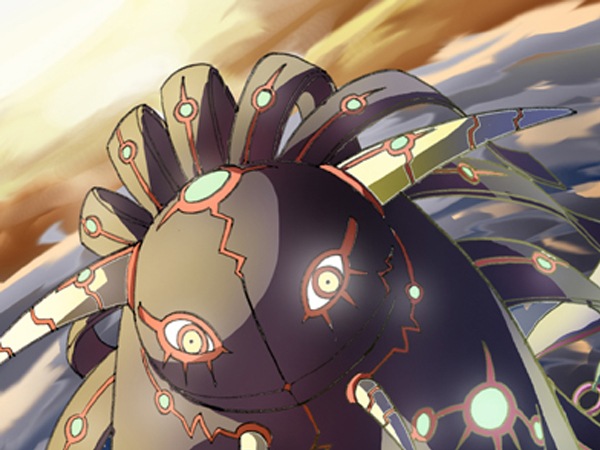
Preview of Final Results
Preview of Final Results
How to Create an Anime Artwork in Photoshop
Step 1 – The Outline
Most people draw the outline on paper then use a scanner to load the outline into Photoshop. Begin by opening the outline image into Photoshop.
1. Use the Levels tool (Image > Adjustments > Levels) to correct the contrast of the outline. You can do this with the Levels tool by moving the black and white input sliders towards the center of the histogram. Make sure that the background is 100% white and the outline is 100% black with smooth edges.
2. To begin, you’ll need to unlock the Background layer. To do this, double-click on the Background layer in the Layers palette and click OK in the New Layer window.
3. Now that the layer is unlocked, you can change the blending mode to Multiply. This will make the white background in the layer transparent.
Tip: Ensure that there are no broken lines. You will be using the Magic Wand tool often and broken lines will slow you down.
Step 2 – Separating the Outline
In this step, you’ll learn how to separate the outline and the background into two layers. This will also make the outline slightly thinner. You’ll also learn how to dissect the outline without any jagged edges using the Load Selection from Layer command.
image
In the above image, you can see the difference between using the Magic Wand tool and the Load Selection from Layer command. The Magic Wand tool produces jagged edges that become apparent when placed on a colored background. Instead of using the Magic Wand tool, use the Load Selection from Layer command to produce smoother outlines that blend well with any background.
1. In the Channels palette (Window > Channels), click on the load channel as selection button. This will create a selection using the tonal information from the layer. Press the Delete button on your keyboard to delete the white background.
2. Add a new layer below the outline layer and fill the layer with white.
3. Change the blending mode of the layer to Multiply.
Step 3 – Base Color
Now that we have the outline and white background separated, we can add the base color.
1. Add a new layer below the white layer.
2. Select the Magic Wand tool and, in the option bar, set the Tolerance to 50.
3. In the option bar, checkmark the Contiguous and Sample All Layers options.
4. With the Magic Wand tool selected, click where you want to add color.
5. Expand the selection by 3 pixels using the Expand command (Select > Modify > Expand). If you are using Windows, you can press Alt, S, M, E on your keyboard to quickly access this menu item.
6. Use the Paint Bucket tool to fill the selection with a color of your choice. Use the same technique (Create a selection with the Magic Wand tool then fill with the Paint Bucket tool) for the entire image.
Step 4 – Adding Shadows
In this part, you’ll learn how to add shadows to the image. One important technique from this step is how to select the correct color.
1. Create a new layer and position it between the white layer and the base color layer.
2. Select the Magic Wand tool and set the tolerance to 1 (so that it will only pick one color) and uncheck the Contiguous and Sample All Layers options.
3. Select the Brush tool and set the hardness to 100%. This will give the brush a sharp edge.
4. In the Tools palette, click on the foreground color. This will bring up the Color Picker window. Select the base color from where you want to start. This will give us the hue of the color. Move the slightly off the area to change the saturation and brightness of the color.
5. Paint the shadows. Be sure to pay attention to where the light is coming from to get proper looking shadows.
Administrador- Administrador
-
Número de Mensagens : 1641
Idade : 39
Data de inscrição : 13/07/2009
Z-Points : 4937 -
How to Create an Anime Artwork in Photoshop
por Administrador Sex 7 Ago - 0:42:25
Step 5 – Dodge and Burn
The Dodge and Burn tool will be used to give a gradient tone effect to the solid colors.

1. Duplicate the layers with the base color and shadow then position them above the original base color and shadow layers. The new layers will be used for dodging and burning while the old layers will be used to load selection with the Magic Wand tool. Select the layer with the base color and use the Magic Wand tool to create a selection of an area that you want to edit. In the image above, we created a selection of the hair.
2. When using the Dodge or Burn tool, turn on the “Other Dynamics” option in the Brushes palette (Window > Brushes).
3. Also, in the Dodge or Burn tool options, set the range option to Midtones.
4. When using the Dodge or Burn tool, set the hardness to 0%.
5. Select the top shadow layer (shade 2 in the screenshot). You will be using the Dodge and Burn tool to create a gradient in the shadows. Start with the Burn tool to darken the areas in a smooth motion on the lower part of the shadow.
6. On the same layer, select the Dodge tool and lighten the upper part of the shadow.
7. Select the duplicated layer with the base color. Use the Dodge tool to lighten the upper area of the base color.
8. Use the Burn tool to burn the lower area of the base color.
Step 6 – Adding Reflected Light
In this step, you’ll learn how to add light reflected from the ambient light.

1. Use the same setting as previously used for the Magic Wand tool.
2. Turn on the “Other Dynamics” setting in the Brush palette (Window > Brushes).
3. Set the Brush hardness to 0%.
4. For this image, a dark purple color was used to shade the area with no reflected light. The light source is from the left of the image so the right side of the characters were painted with dark purple.
5. A light yellow color was used to shade the areas facing the ambient light.
Step 7 – Coloring the Outline
Coloring the outline will add more detail to the final image and it’s easy to do.

1. Leave the brush presets on.
2. In the Layers palette, select the layer with the outline then lock the transparent pixels by clicking on the lock trasnparent pixels button.
3. Use the Brush tool to color the outline using a color that is close to the outline.
4. Keep using the Eye Dropper tool to select the color beside the outline.
Step 8 – Creating the Smokes
Now you’ll learn how the smoke swirling around the characters were created.


1. Create a new layer for the clouds. Use the Brush tool with a hardness of 100% and paint some zigzag shapes for the smoke.
2. Use the Smudge tool to smudge it in the motion shown above.
3. Use the Dodge and Burn tools to create volume on the smoke so that it looks 3D.
4. Load the selection (Select > Load Selection) of your smoke layer. Choose Select > Modify > Contract and enter an amount that will make the selection half its size. You may have to undo and try this several times to get the correct amount.
5. Create a new layer for the smoke highlights. Use the Brush tool and paint inside the smoke with yellow orange.
6. Select the Move tool and nudge the layer up by pressing the up arrow on your keyboard.
The Dodge and Burn tool will be used to give a gradient tone effect to the solid colors.
1. Duplicate the layers with the base color and shadow then position them above the original base color and shadow layers. The new layers will be used for dodging and burning while the old layers will be used to load selection with the Magic Wand tool. Select the layer with the base color and use the Magic Wand tool to create a selection of an area that you want to edit. In the image above, we created a selection of the hair.
2. When using the Dodge or Burn tool, turn on the “Other Dynamics” option in the Brushes palette (Window > Brushes).
3. Also, in the Dodge or Burn tool options, set the range option to Midtones.
4. When using the Dodge or Burn tool, set the hardness to 0%.
5. Select the top shadow layer (shade 2 in the screenshot). You will be using the Dodge and Burn tool to create a gradient in the shadows. Start with the Burn tool to darken the areas in a smooth motion on the lower part of the shadow.
6. On the same layer, select the Dodge tool and lighten the upper part of the shadow.
7. Select the duplicated layer with the base color. Use the Dodge tool to lighten the upper area of the base color.
8. Use the Burn tool to burn the lower area of the base color.
Step 6 – Adding Reflected Light
In this step, you’ll learn how to add light reflected from the ambient light.
1. Use the same setting as previously used for the Magic Wand tool.
2. Turn on the “Other Dynamics” setting in the Brush palette (Window > Brushes).
3. Set the Brush hardness to 0%.
4. For this image, a dark purple color was used to shade the area with no reflected light. The light source is from the left of the image so the right side of the characters were painted with dark purple.
5. A light yellow color was used to shade the areas facing the ambient light.
Step 7 – Coloring the Outline
Coloring the outline will add more detail to the final image and it’s easy to do.
1. Leave the brush presets on.
2. In the Layers palette, select the layer with the outline then lock the transparent pixels by clicking on the lock trasnparent pixels button.
3. Use the Brush tool to color the outline using a color that is close to the outline.
4. Keep using the Eye Dropper tool to select the color beside the outline.
Step 8 – Creating the Smokes
Now you’ll learn how the smoke swirling around the characters were created.
1. Create a new layer for the clouds. Use the Brush tool with a hardness of 100% and paint some zigzag shapes for the smoke.
2. Use the Smudge tool to smudge it in the motion shown above.
3. Use the Dodge and Burn tools to create volume on the smoke so that it looks 3D.
4. Load the selection (Select > Load Selection) of your smoke layer. Choose Select > Modify > Contract and enter an amount that will make the selection half its size. You may have to undo and try this several times to get the correct amount.
5. Create a new layer for the smoke highlights. Use the Brush tool and paint inside the smoke with yellow orange.
6. Select the Move tool and nudge the layer up by pressing the up arrow on your keyboard.
Administrador- Administrador
-
Número de Mensagens : 1641
Idade : 39
Data de inscrição : 13/07/2009
Z-Points : 4937 -
How to Create an Anime Artwork in Photoshop
por Administrador Sex 7 Ago - 0:45:17
Step 9 – Creating the Cloudy Sky
Creating the cloudy sky uses a similar process as the previous step.

1. Create a new layer for the sky and name the layer “sky”. Use the Gradient Tool to create a gradient like the image above (#1).
2. Create a new layer above the sky layer and name this “clouds”. Use the Brush tool and paint some lines to create the shape of the cloud.
3. Use the Smudge tool to smudge the cloud layer in the motion shown (#3).
4. Load the selection of the clouds layer (Select > Load Selection). Choose Select > Modify > Contract and contract the selection like you did when you were creating the smoke. The selection should be close to half of what it was. You may have to try this more than once to get the right value.
5. Create a new layer and mane this layer “clouds 2”. Position it above the clouds layer. Select a color that it slightly darker than the color you used to create the clouds. It should still have the same hue and saturation. Paint the selected area with this color.
6. Use the Dodge and Burn tools to add volume to the clouds so that they look 3D.
7. Duplicate the clouds layer then use the Free Transform tool (Edit > Free Transform) and enlarge the cloud. Set the opacity of this new layer to 75%.
8. Use the Dodge and Burn tools on the sky layer to create a light source.
Step 10 – Adding Light

1. Create a new layer and name this layer “light”. Move the layer to the very top so that it is above all the other layers.
2. Select the Brush tool. In the Brushes palette (Window > Brushes), checkmark the Other Dynamics option.
3. Set the brush hardness to 0% for soft edges.
4. Select white as the foreground color then paint the areas where you want the light to appear. The image above shows the areas that were painted.
Step 11 – Tinting With a Gradient
This step will show you how to create more realistic colors by warming the areas closest to the light source and cooling the areas away from it.


1. Create a new layer and position it above all the other layers.
2. Load the selection of the characters then use the Gradient tool to create a orange to blue gradient. Because the light source of the drawing used for this tutorial is from the left side, I will draw a gradient from the left to right. This will make the left side warmer and the right side cooler.
3. Change the blending mode of the current layer to Color.
4. Lower the opacity to about 10-20%.
Final Results
Cumps
TheKillerJp
Creating the cloudy sky uses a similar process as the previous step.
1. Create a new layer for the sky and name the layer “sky”. Use the Gradient Tool to create a gradient like the image above (#1).
2. Create a new layer above the sky layer and name this “clouds”. Use the Brush tool and paint some lines to create the shape of the cloud.
3. Use the Smudge tool to smudge the cloud layer in the motion shown (#3).
4. Load the selection of the clouds layer (Select > Load Selection). Choose Select > Modify > Contract and contract the selection like you did when you were creating the smoke. The selection should be close to half of what it was. You may have to try this more than once to get the right value.
5. Create a new layer and mane this layer “clouds 2”. Position it above the clouds layer. Select a color that it slightly darker than the color you used to create the clouds. It should still have the same hue and saturation. Paint the selected area with this color.
6. Use the Dodge and Burn tools to add volume to the clouds so that they look 3D.
7. Duplicate the clouds layer then use the Free Transform tool (Edit > Free Transform) and enlarge the cloud. Set the opacity of this new layer to 75%.
8. Use the Dodge and Burn tools on the sky layer to create a light source.
Step 10 – Adding Light
1. Create a new layer and name this layer “light”. Move the layer to the very top so that it is above all the other layers.
2. Select the Brush tool. In the Brushes palette (Window > Brushes), checkmark the Other Dynamics option.
3. Set the brush hardness to 0% for soft edges.
4. Select white as the foreground color then paint the areas where you want the light to appear. The image above shows the areas that were painted.
Step 11 – Tinting With a Gradient
This step will show you how to create more realistic colors by warming the areas closest to the light source and cooling the areas away from it.
1. Create a new layer and position it above all the other layers.
2. Load the selection of the characters then use the Gradient tool to create a orange to blue gradient. Because the light source of the drawing used for this tutorial is from the left side, I will draw a gradient from the left to right. This will make the left side warmer and the right side cooler.
3. Change the blending mode of the current layer to Color.
4. Lower the opacity to about 10-20%.
Final Results
Cumps
TheKillerJp
Administrador- Administrador
-
Número de Mensagens : 1641
Idade : 39
Data de inscrição : 13/07/2009
Z-Points : 4937 -